Muscle specialists everywhere will tell you, healthy tissue doesn’t hurt. Sure, you’ll be sore after a hard workout and might experience some delay onset muscle soreness (DOMS), but if you have chronic pain in a joint or muscle, something is wrong.
A mobility limitation is not only a common culprit for pain during and after exercise, but it can be affecting your ability to perform movements to the best of your ability and at your maximum strength capacity.
Surprised? If you think about it, it makes sense.
If you have tight hips or calves for example, being comfortable in the bottom of your squat might be a problem. Combine those with a limited range of motion in your shoulders, and executing a heavy snatch is not only a nightmare, but darn near impossible.
It doesn’t matter if you’re training for the Crossfit Games, or just training to still be able to get out of bed when you’re 70, doing daily mobility activities is an absolutely essential part of any well-rounded fitness plan.
The best news? You don’t have to try to find time to fit in a 90 minute yoga session every day to reap the benefits. Including these 4 exercises in your every day warm up will take less than 10 minutes, and will pay big rewards in the way your lower body feels and performs.
Foam Roll
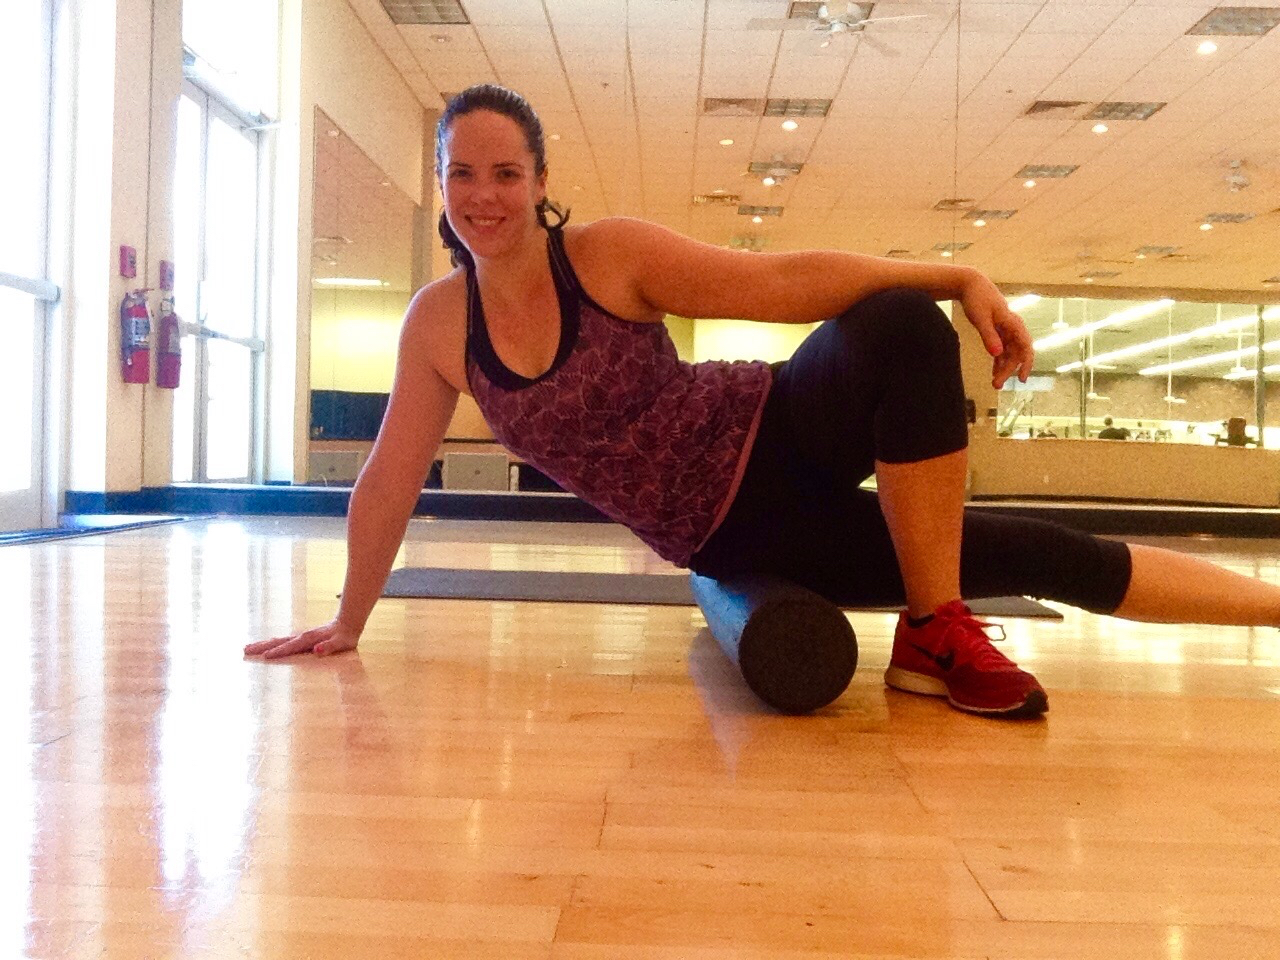
Spend a few sadistic minutes on the foam roller every day, and your body will thank you. This tool massages your muscles, helping to relieve tension and break up any soreness that you might have. Try this easy sequence to hit your whole body in around 5 minutes.
Quads: Start facedown the the foam roller under your quadriceps. Balancing on your elbows roll forward and backwards from hips to kneecaps.
IT Bands: Rotate to the side to hit your outer thighs and IT bands. Use your body to leverage weight from your knee to hip. (pictured)
Glutes: Work from your IT band in your hip into your glutes. Roll both at the same time, then try crossing one ankle over the opposite knee and rolling on the side of the crossed leg for a deeper massage.
Hamstrings and calves: Work back down your legs, this time face up, to hit your hamstrings and calves.
Back: Finally, roll the foam roller up and massage along your spine. Start at your lower back working up to your shoulder blades and back down. Try hugging your arms to your body, or rotating to the sides to hit your t-spine and lats.
Hamstring Stretch
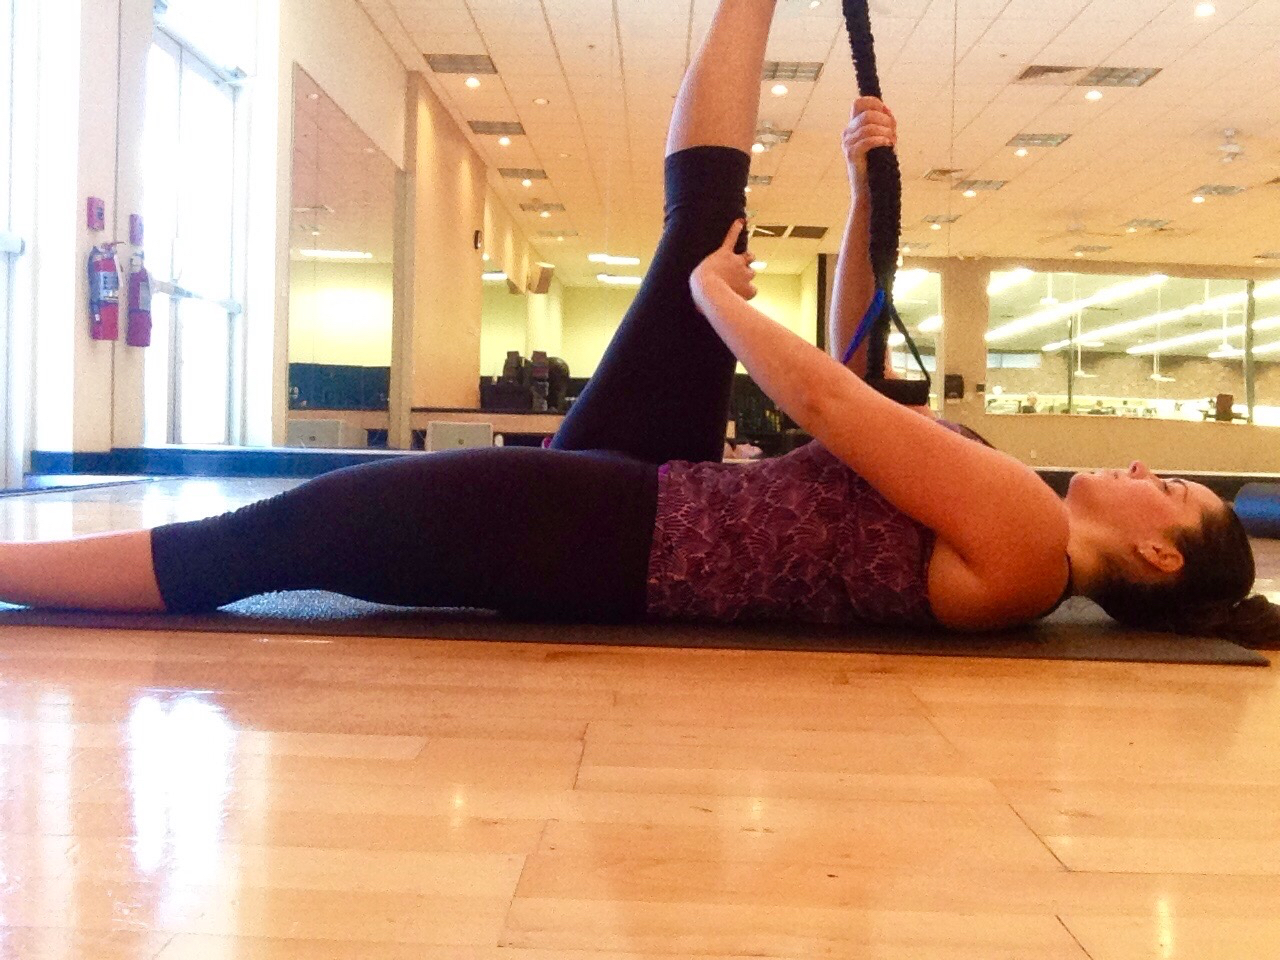
Tight hamstrings can lead to a whole host of issues, not the least of which is lower back pain. Spending 1 minute per leg daily stretching these large leg muscles will keep you loose and limber.
Step 1: Lay on your back, extending both legs straight.
Step 2: Using a band, lace it around the instep of one foot and extend the foot straight up.
Step 3: Concentrate on keeping both legs as straight as possible while gently pulling the band (and your leg) in toward your body. Hold for 1 minute, then switch sides.
Calf Stretch
Stretching your calves daily is a quick and easy way to keep your ankles mobile. This can help with mobility in your squats, and keeping your Achilles tendon happy during running WOD’s.
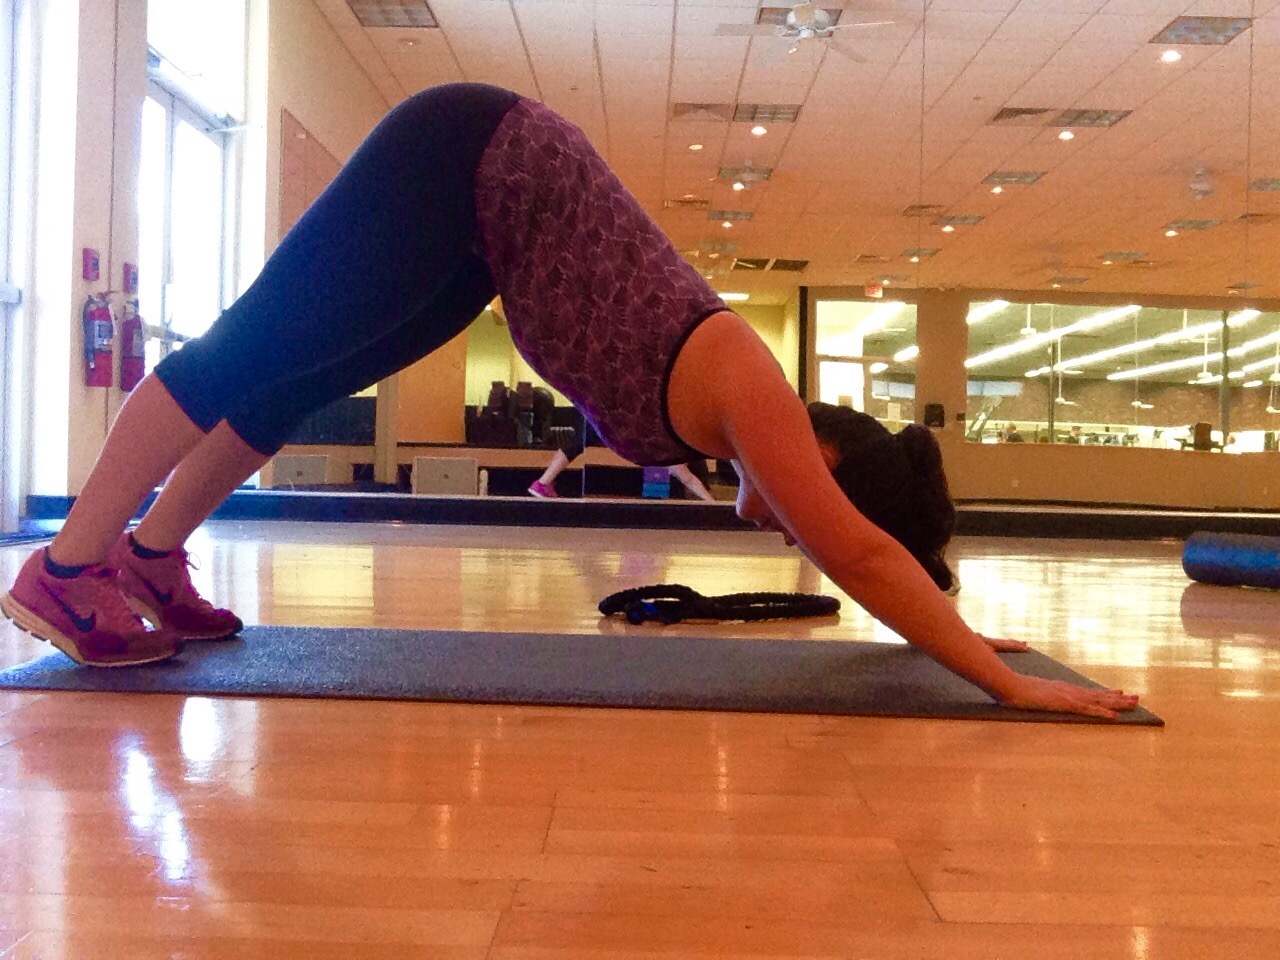
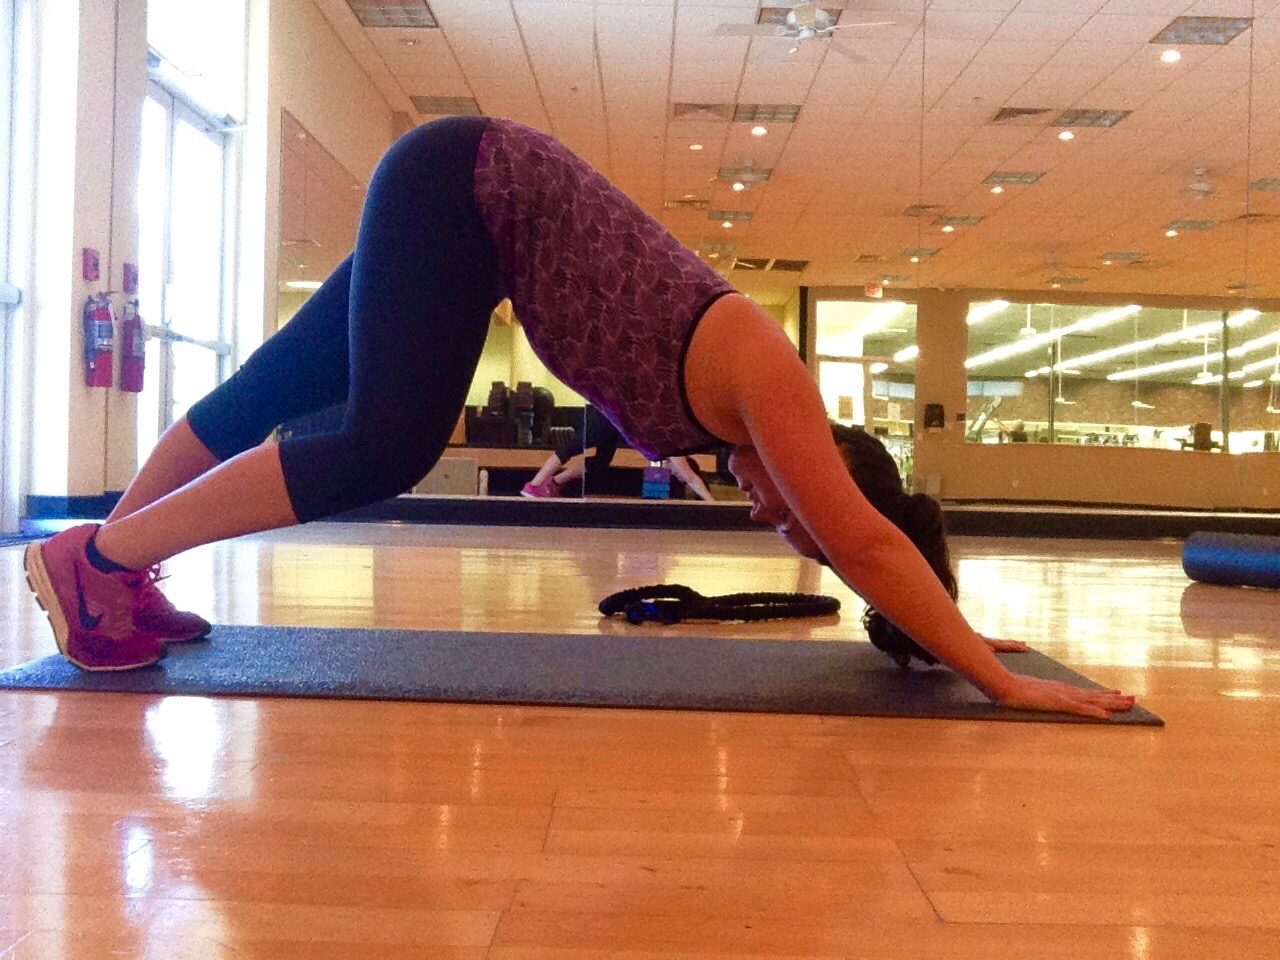
There’s a million ways to stretch your calves, but we love the Yoga pose Downward Dog. Not only is it great on your calves, it hits your hamstrings, low back, and shoulders all in one.
Step 1: Start on all fours on a mat. Place your hands directly beneath your shoulder blades, spreading your fingers apart like you’re about to give a really enthusiastic high five. Take your toes back so that your body is in a plank.
Step 2: From here, keeping your back flat and legs straight, lift your butt towards the sky by pressing your head back between your arms. Engage your shoulders, keeping them pressed down away from your ears. Concentrate on keeping your knees straight, and sinking your heels towards the matt.
Step 3: To deepen the stretch in your calves, bicycle your feet pressing one towards the floor and then the other, holding each side a few seconds. Think about bringing your heels a little closer to the floor each time you shift your weight.
Step 4: Bring your heels back to even and hold. Hold this pose for at least a minute. If it feels so amazing you don’t want to quit, take a short break and do it again. Ahhhh.
Hip Opener
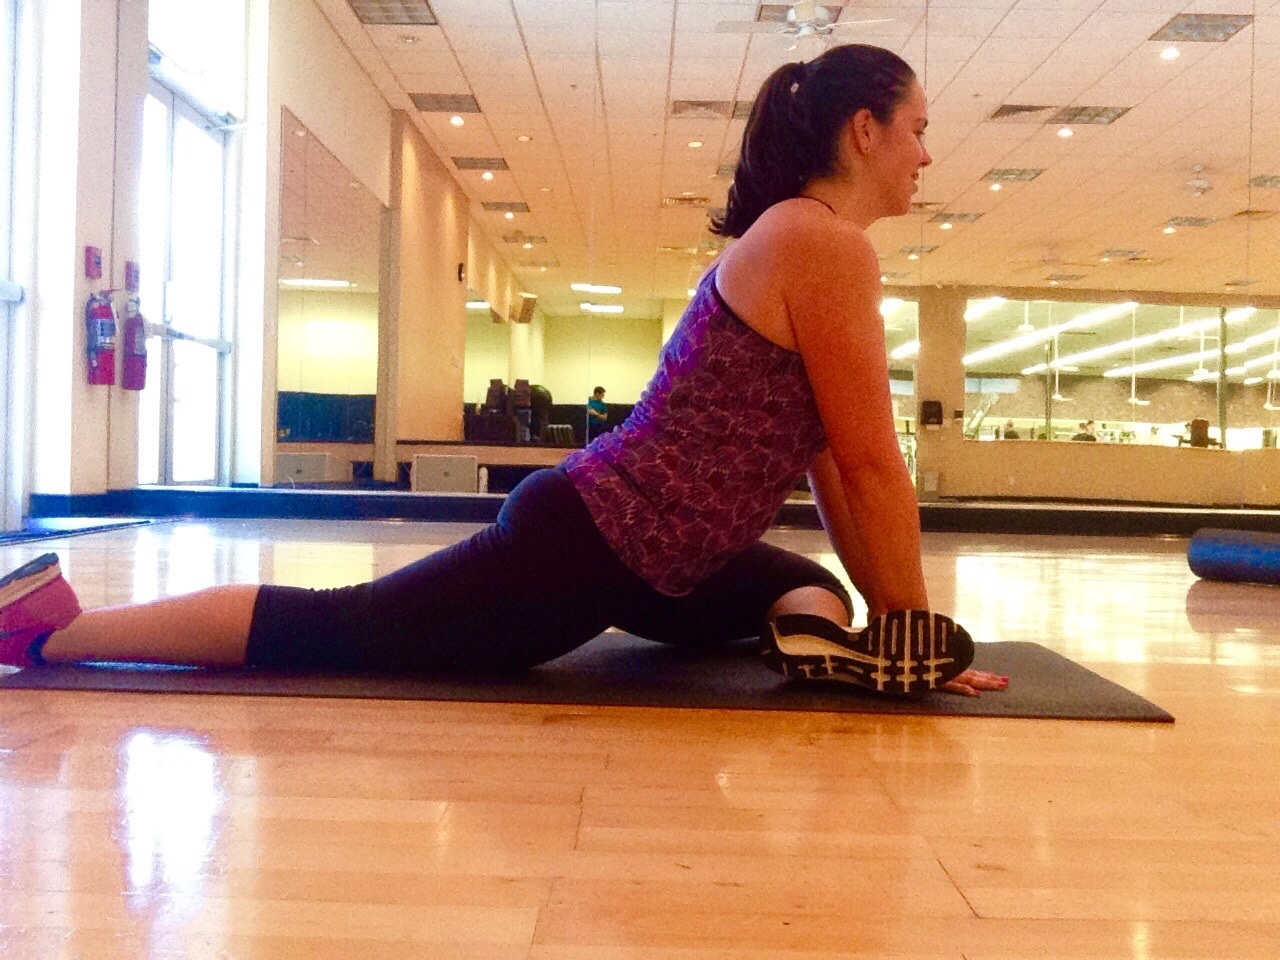
If you’ve ever just totally fallen on your butt while trying to overhead squat, or catch a snatch, there’s a good chance your hips are tight. Because we all sit at our desks all day, it’s a common problem. There’s dozens of hip opening stretches you can do, and we recommend combining Pigeon Pose that we describe below with one of your choice to open your hip flexors. Pigeon pose targets your outer hips and glutes, and definitely hurts so good.
Step 1: Begin on a mat on all fours. Bring your right leg forward and bend it at a 90 degree angle. You want your foot to be straight out from your left hip and to keep that same angle throughout the stretch. Thank about keeping your hips square, and driving your left hip bone straight down towards the matt.
Step 2: Work to bring your knee down to the matt. Note- this isn’t easy! In the photo I manage to get my leg flat, but on my other side my knee is a solid 6-8 inches off the ground because of limited mobility. You might find that you’re holding yourself up and slowly working down into the stretch, and that’s ok. Breathe through it, work to keep your hips square, and hold for 1 minute on each side.
**If this is too difficult you can make it easier by putting your front leg in the 90 degree angle on a box to start. The higher the box, the easier the stretch will be.**
Want more? The mobility man himself, Kelly Starett, gives you literally hundreds of ways to become a “supple leopard” on Mobility WOD, so check it out. And be sure to stay tuned for our upper body mobility circuit coming soon to Fitness HQ.

